
단계별로 따지면 총 5단계이다.
- 소스 파일 및 flatc.exe 다운로드
- 파일들 경로 세팅
- *.fbs(IDL) 정의
- *.fbs 컴파일
- 컴파일한 *.h include
소스 파일 및 flatc.exe 다운로드
https://github.com/google/flatbuffers/releases
Releases · google/flatbuffers
FlatBuffers: Memory Efficient Serialization Library - google/flatbuffers
github.com
해당 사이트에서 가장 최신의것을 다운받으면 된다.
자신의 환경에 맞게 다운받으면 된다.
윈도우를 사용중이라면 Windows.flatc.binary.zip을 다운받고
Source code (zip) 도 다운받으면 된다.
파일들 경로 세팅
binary 폴더 안에 flatc.exe가 있을 것이다.
자신이 사용하기 편한 위치에 두면 된다.
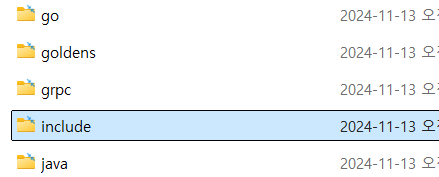
다운한 Source 폴더는 flatbuffers-버전 형태로 되어있을 것이다.
필요한건 include/flatbuffers 이다.
해당 폴더를 복사해 자신의 프로젝트 폴더 내로 이동시키면 된다.
* .fbs(IDL) 정의
이 포스팅에서는 공식문서 Tutorial에서 제공하는 Monster.fbs를 사용한다.
// Example IDL file for our monster's schema.

namespace MyGame.Sample;

enum Color:byte { Red = 0, Green, Blue = 2 }

union Equipment { Weapon } // Optionally add more tables.

struct Vec3 {
  x:float;
  y:float;
  z:float;
}

table Monster {
  pos:Vec3; // Struct.
  mana:short = 150;
  hp:short = 100;
  name:string;
  friendly:bool = false (deprecated);
  inventory:[ubyte];  // Vector of scalars.
  color:Color = Blue; // Enum.
  weapons:[Weapon];   // Vector of tables.
  equipped:Equipment; // Union.
  path:[Vec3];        // Vector of structs.
}

table Weapon {
  name:string;
  damage:short;
}

root_type Monster;해석하자면
- Mygame::Sample namespace안에 해당 내용을 넣겠다.
- enum Color:byte 정의
- enum Equipment 정의(테이블명 사용, 패킷 이름 식별용)
- struct는 말 그대로 struct
- table도 컴파일하면 struct로 나오긴 하지만 지원하는 함수가 더 많음
- root_type은 Monster table이 최상위로 사용됨을 의미(별 의미 없음, 없어도 컴파일 잘됨)
이 외에도 다양하게 있으니 더 알고싶으면 아래 문서를 참고하면 된다.
https://flatbuffers.dev/flatbuffers_guide_writing_schema.html
FlatBuffers: Writing a schema
The syntax of the schema language (aka IDL, Interface Definition Language) should look quite familiar to users of any of the C family of languages, and also to users of other IDLs. Let's look at an example first: // example IDL file namespace MyGame; attri
flatbuffers.dev
https://flatbuffers.dev/flatbuffers_grammar.html
FlatBuffers: Grammar of the schema language
schema = include* ( namespace_decl | type_decl | enum_decl | root_decl | file_extension_decl | file_identifier_decl | attribute_decl | rpc_decl | object )* include = include string_constant ; namespace_decl = namespace ident ( . ident )* ; attribute_decl =
flatbuffers.dev
*.fbs 컴파일
[실행할 flatc.exe 경로] [사용할 언어 옵션] [...컴파일할 .fbs들]
ex) ./flatc.exe --cpp monster.fbs
컴파일한 *.h include
컴파일하면 monster_generated.h 파일이 생성될 것이다.
해당 파일을 include하면 된다.
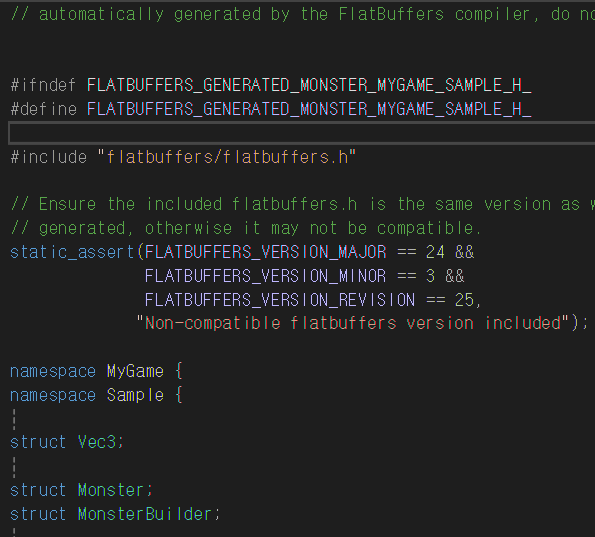
해당 헤더 파일의 내부를 살펴보면 flatbuffers/flatbuffers.h를 include하고 있다.
즉 해당 헤더파일과 flatbuffers/flatbuffers.h를 같은 경로에 두어야 정상작동한다.
#include <iostream>
#include "Monster_generated.h"
using namespace MyGame::Sample;
int main()
{
    flatbuffers::FlatBufferBuilder builder;

    // First, lets serialize some weapons for the Monster: A 'sword' and an 'axe'.
    auto weapon_one_name = builder.CreateString("Sword");
    short weapon_one_damage = 3;

    auto weapon_two_name = builder.CreateString("Axe");
    short weapon_two_damage = 5;

    // Use the `CreateWeapon` shortcut to create Weapons with all fields set.
    auto sword = CreateWeapon(builder, weapon_one_name, weapon_one_damage);
    auto axe = CreateWeapon(builder, weapon_two_name, weapon_two_damage);

    // Create a FlatBuffer's `vector` from the `std::vector`.
    std::vector<flatbuffers::Offset<Weapon>> weapons_vector;
    weapons_vector.push_back(sword);
    weapons_vector.push_back(axe);
    auto weapons = builder.CreateVector(weapons_vector);

    // Second, serialize the rest of the objects needed by the Monster.
    auto position = Vec3(1.0f, 2.0f, 3.0f);

    auto name = builder.CreateString("MyMonster");

    unsigned char inv_data[] = { 0, 1, 2, 3, 4, 5, 6, 7, 8, 9 };
    auto inventory = builder.CreateVector(inv_data, 10);

    // Shortcut for creating monster with all fields set:
    auto orc = CreateMonster(builder, &position, 150, 80, name, inventory,
        Color_Red, weapons, Equipment_Weapon, axe.Union());

    builder.Finish(orc);  // Serialize the root of the object.

    // We now have a FlatBuffer we can store on disk or send over a network.

    // ** file/network code goes here :) **
    // access builder.GetBufferPointer() for builder.GetSize() bytes

    // Instead, we're going to access it right away (as if we just received it).

    // Get access to the root:
    auto monster = GetMonster(builder.GetBufferPointer());

    // Get and test some scalar types from the FlatBuffer.
    assert(monster->hp() == 80);
    assert(monster->mana() == 150);  // default
    assert(monster->name()->str() == "MyMonster");

    // Get and test a field of the FlatBuffer's `struct`.
    auto pos = monster->pos();
    assert(pos);
    assert(pos->z() == 3.0f);
    (void)pos;

    // Get a test an element from the `inventory` FlatBuffer's `vector`.
    auto inv = monster->inventory();
    assert(inv);
    assert(inv->Get(9) == 9);
    (void)inv;

    // Get and test the `weapons` FlatBuffers's `vector`.
    std::string expected_weapon_names[] = { "Sword", "Axe" };
    short expected_weapon_damages[] = { 3, 5 };
    auto weps = monster->weapons();
    for (unsigned int i = 0; i < weps->size(); i++) {
        assert(weps->Get(i)->name()->str() == expected_weapon_names[i]);
        assert(weps->Get(i)->damage() == expected_weapon_damages[i]);
    }
    (void)expected_weapon_names;
    (void)expected_weapon_damages;

    // Get and test the `Equipment` union (`equipped` field).
    assert(monster->equipped_type() == Equipment_Weapon);
    auto equipped = static_cast<const Weapon*>(monster->equipped());
    assert(equipped->name()->str() == "Axe");
    assert(equipped->damage() == 5);
    (void)equipped;

    printf("The FlatBuffer was successfully created and verified!\n");
	return 0;
}공식문서에서 제공하는 Sample.cpp 파일이다.
The FlatBuffer was successfully created and verified!
라는 문구가 출력되면 정상적으로 작동하는것이다.
'C++' 카테고리의 다른 글
| [C++] Inline함수와 #Define 차이점 (0) | 2024.11.01 |
|---|---|
| [C++] IOCP OverlappedEx 구조체에 관하여 (0) | 2024.10.21 |
| [C++] find_if 로 특정 클래스 가져오기 (0) | 2024.07.13 |
| [C++] String Compare vs strcmp (0) | 2023.07.22 |
| [C++] Html Form 인코딩된 데이터 디코딩하기 (0) | 2023.07.05 |